插值
插值是图形编程中的一种常规操作,可以在两个值之间进行混合或过渡。插值还可以让移动、旋转等运动变得平滑。熟悉插值对拓展游戏开发者的视野大有裨益。
基本思想是从 A 转换到 B。t 值是介于两者之间的状态。
举个例子,如果 t 是 0,那么他的状态是 A。如果 t 是 1,那么它的状态是 B。任何介于两者之间的状态都是插值。
两个实数(浮点数)之间的插值可以描述为:
interpolation = A * (1 - t) + B * t
通常简化为:
interpolation = A + (B - A) * t
这种以恒定速度将一个值转换为另一个值的插值被称为“线性”。因此,当你听到线性插值时,你就知道他们指的是这个公式。
还有其他类型的插值, 这里将不做讨论. 建议之后阅读 Bezier 页面.
向量插值
向量类型(Vector2 和 Vector3)也可以插值,向量自带了相关的便捷函数 Vector2.lerp() 和 Vector3.lerp()。
对于三次插值,还有 Vector2.cubic_interpolate() 和 Vector3.cubic_interpolate() ,它们执行 Bezier 式插值。
下面是从 A 点插值到 B 点的示例伪代码:
var t = 0.0

func _physics_process(delta):
    t += delta * 0.4

    $Sprite2D.position = $A.position.lerp($B.position, t)
private float _t = 0.0f;

public override void _PhysicsProcess(double delta)
{
    _t += (float)delta * 0.4f;

    Marker2D a = GetNode<Marker2D>("A");
    Marker2D b = GetNode<Marker2D>("B");
    Sprite2D sprite = GetNode<Sprite2D>("Sprite2D");

    sprite.Position = a.Position.Lerp(b.Position, _t);
}
它将产生以下运动:
变换插值
也可以对整个变换进行插值(确保它们具有均一缩放,或者至少有相同的非均一缩放)。为此,可以使用函数 Transform3D.interpolate_with()。
下面是将猴子从位置1转换为位置2的例子:
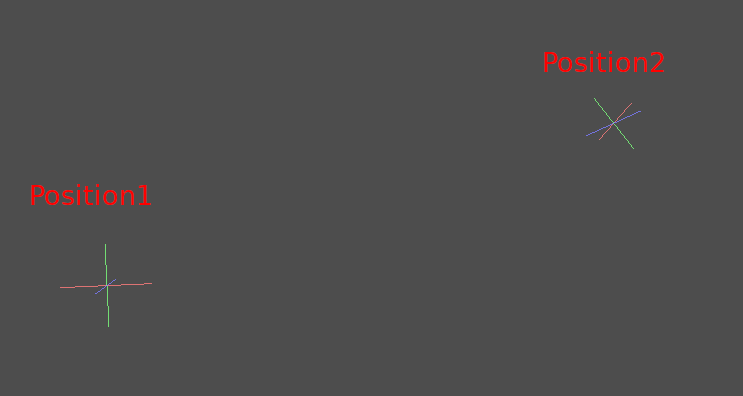
使用以下伪代码:
var t = 0.0

func _physics_process(delta):
    t += delta

    $Monkey.transform = $Position1.transform.interpolate_with($Position2.transform, t)
private float _t = 0.0f;

public override void _PhysicsProcess(double delta)
{
    _t += (float)delta;

    Marker3D p1 = GetNode<Marker3D>("Position1");
    Marker3D p2 = GetNode<Marker3D>("Position2");
    CSGMesh3D monkey = GetNode<CSGMesh3D>("Monkey");

    monkey.Transform = p1.Transform.InterpolateWith(p2.Transform, _t);
}
又会产生下面的动作:
平滑运动
Interpolation can be used to smoothly follow a moving target value, such as a
position or a rotation. Each frame, lerp() moves the current value towards
the target value by a fixed percentage of the remaining difference between the values.
The current value will smoothly move towards the target, slowing down as it gets
closer. Here is an example of a circle following the mouse using interpolation smoothing:
const FOLLOW_SPEED = 4.0

func _physics_process(delta):
    var mouse_pos = get_local_mouse_position()

    $Sprite2D.position = $Sprite2D.position.lerp(mouse_pos, delta * FOLLOW_SPEED)
private const float FollowSpeed = 4.0f;

public override void _PhysicsProcess(double delta)
{
    Vector2 mousePos = GetLocalMousePosition();

    Sprite2D sprite = GetNode<Sprite2D>("Sprite2D");

    sprite.Position = sprite.Position.Lerp(mousePos, (float)delta * FollowSpeed);
}
如下:

This is useful for smoothing camera movement, for allies following the player (ensuring they stay within a certain range), and for many other common game patterns.
备注
Despite using delta, the formula used above is framerate-dependent, because
the weight parameter of lerp() represents a percentage of the remaining
difference in values, not an absolute amount to change. In _physics_process(),
this is usually fine because physics is expected to maintain a constant framerate,
and therefore delta is expected to remain constant.
For a framerate-independent version of interpolation smoothing that can also
be used in process(), use the following formula instead:
const FOLLOW_SPEED = 4.0

func _process(delta):
    var mouse_pos = get_local_mouse_position()
    var weight = 1 - exp(-FOLLOW_SPEED * delta)
    $Sprite2D.position = $Sprite2D.position.lerp(mouse_pos, weight)
private const float FollowSpeed = 4.0f;

public override void _Process(double delta)
{
    Vector2 mousePos = GetLocalMousePosition();

    Sprite2D sprite = GetNode<Sprite2D>("Sprite2D");
    float weight = 1f - Mathf.Exp(-FollowSpeed * (float)delta);
    sprite.Position = sprite.Position.Lerp(mousePos, weight);
}
Deriving this formula is beyond the scope of this page. For an explanation, see Improved Lerp Smoothing or watch Lerp smoothing is broken.